Have your original pistol’s owner’s manual ready. The only tool you will need is a paper clip, safety pin, or comparable device if you plan to transplant your donor pistol’s magazine release.
Warning: Ensure your firearm is unloaded before performing any steps in this guide.
Reference sections 8.1 – Pistol Disassembly, 9.2 – Magazine Catch Removal and Reversal, and 9.3 – Changing the Grip Module in the original P320 owner’s manual. (Many diagrams in this guide are borrowed from the digital version of the P320’s owners manual and has been done for educational and safety purposes. Fire Control Unit is not affiliated with Sig Sauer® Corp)
 7. Remove the takedown lever (turn and pull simultaneously)
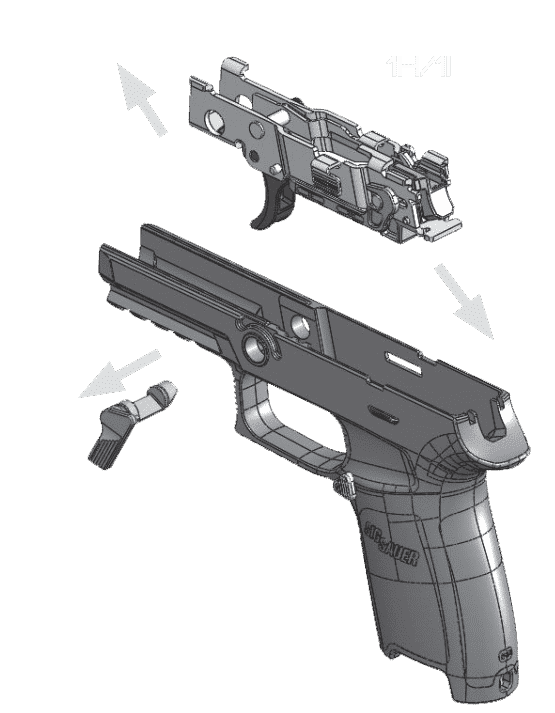
8. Push the fire control unit (FCU) forward.
9. Pull up on the FCU rails and remove them to rotate the frame assembly out from the grip module.
7. Remove the takedown lever (turn and pull simultaneously)
8. Push the fire control unit (FCU) forward.
9. Pull up on the FCU rails and remove them to rotate the frame assembly out from the grip module.
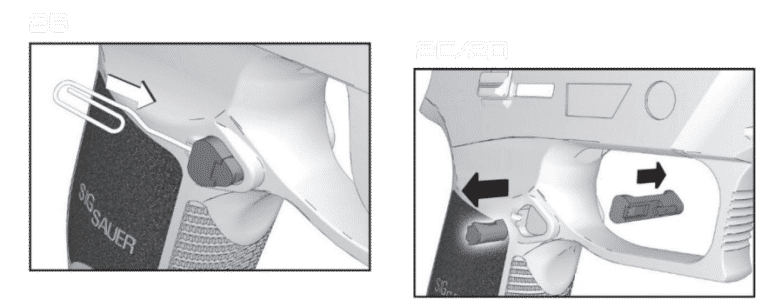
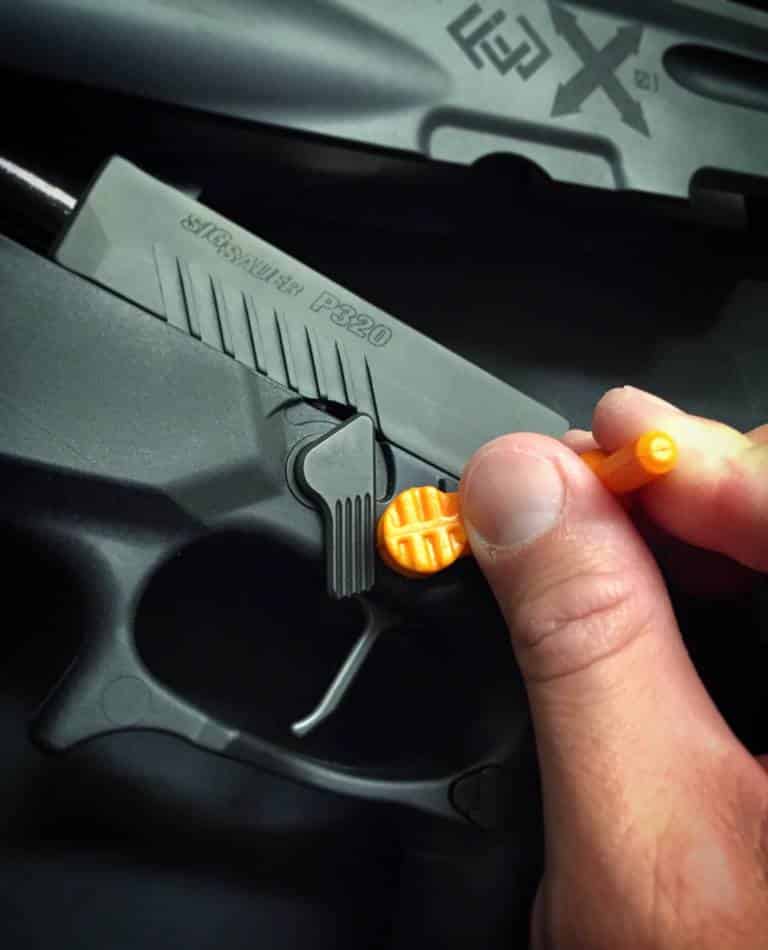
(We recommend the purchase of an additional magazine release available here (OEM) or here (enhanced aftermarket)).1. Depress the magazine catch until the back protrudes slightly from the opposite side and hold.2. On the protruding side, press the straightened end of a paper clip into the hole on the back side of the magazine catch to release the magazine catch stop.
3. Remove the magazine catch stop.
4. Remove the magazine catch and magazine catch spring, keeping the two pieces together.
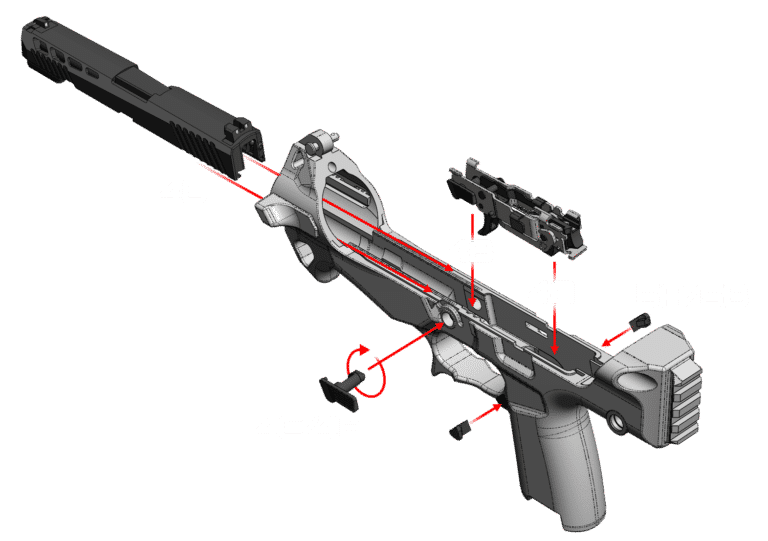 1. Insert the FCU locking tab into the mating slot inside the rear of the X01 grip module.
2. Press down on the frame rails, rotating the frame assembly into position.
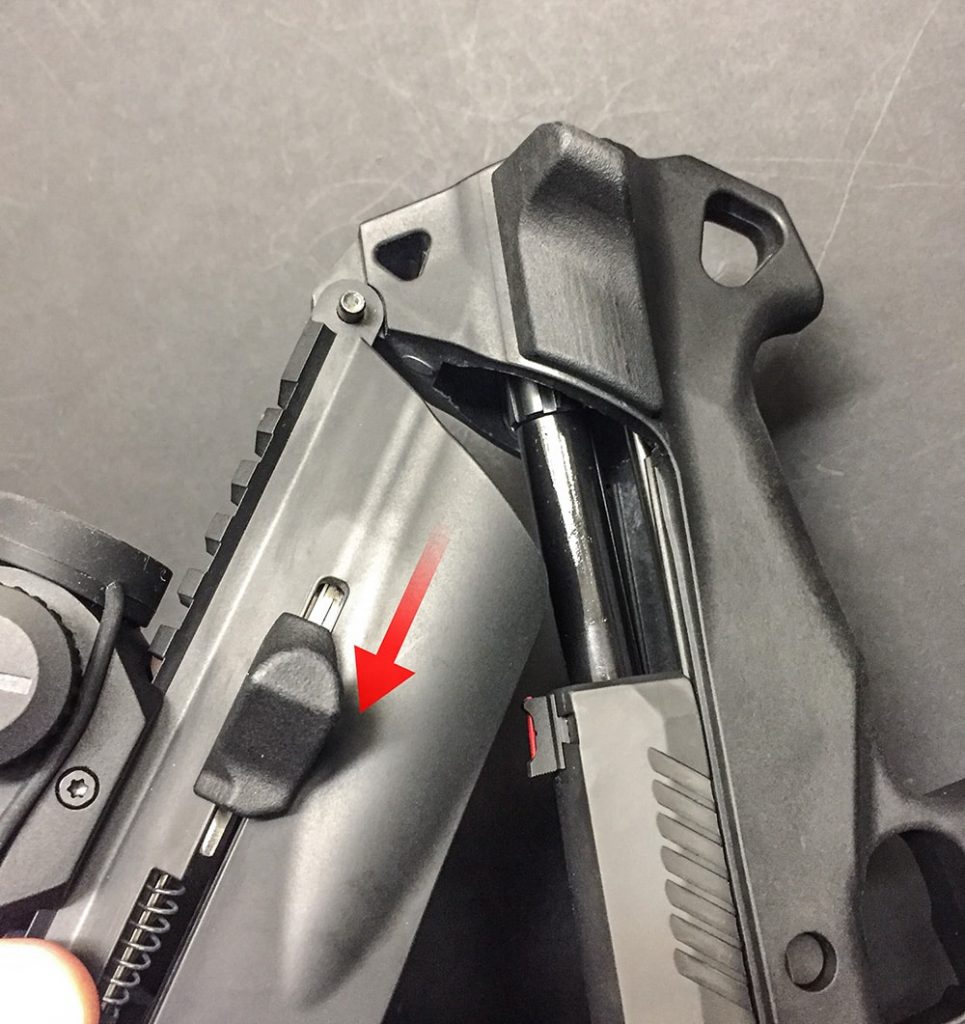
3. Insert the takedown lever (turn and push simultaneously) through the corresponding hole on the left side of the grip module/frame assembly, locking the frame assembly in place. A plastic or wooden instrument may make this easier and prevent scratches to the firearm.
4. Guide the slide onto the FCU rails by inserting it through the X01 muzzle area as shown.
1. Insert the FCU locking tab into the mating slot inside the rear of the X01 grip module.
2. Press down on the frame rails, rotating the frame assembly into position.
3. Insert the takedown lever (turn and push simultaneously) through the corresponding hole on the left side of the grip module/frame assembly, locking the frame assembly in place. A plastic or wooden instrument may make this easier and prevent scratches to the firearm.
4. Guide the slide onto the FCU rails by inserting it through the X01 muzzle area as shown.
 5. Retract the slide fully to the rear. Engage the slide catch lever to lock the slide in the open position.
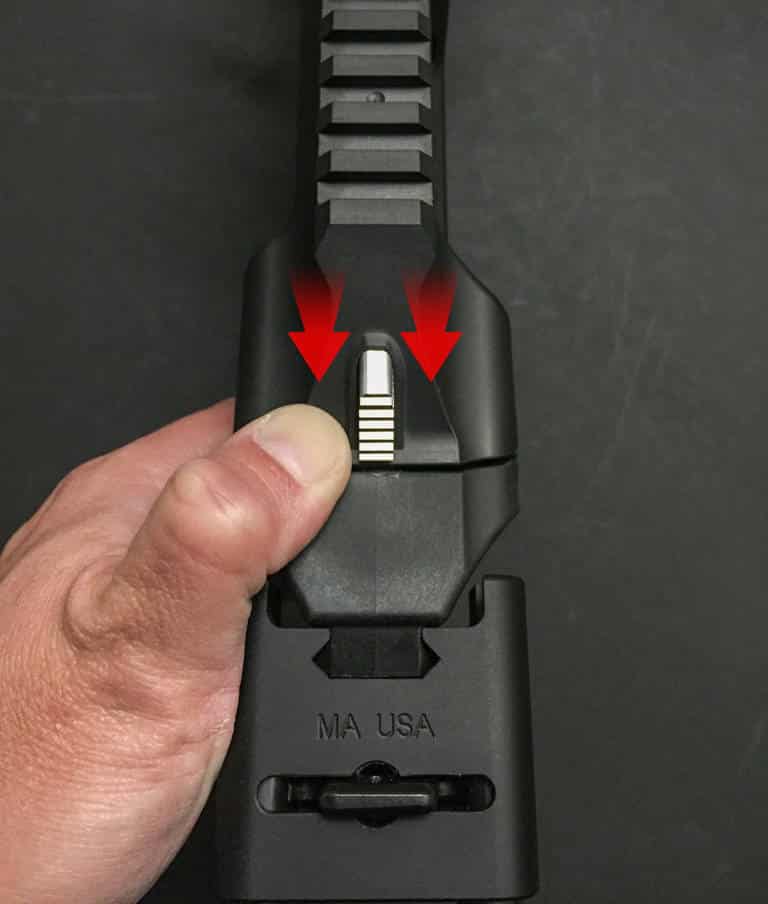
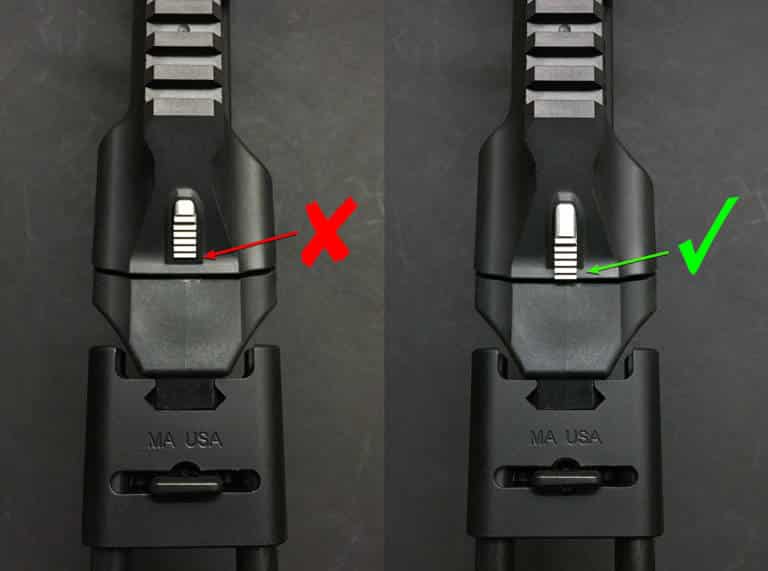
6. Rotate the takedown lever counter-clockwise until horizontal.
7. Close the X01 and ensure the rear latch is engaged.
5. Retract the slide fully to the rear. Engage the slide catch lever to lock the slide in the open position.
6. Rotate the takedown lever counter-clockwise until horizontal.
7. Close the X01 and ensure the rear latch is engaged.
 Note: The X01 upper module is completely closed when the rear latch is engaged.
 8. Cycle the charging handle being sure it goes all the way to the rear. Your slide should be released from the slide stop and now cycles with the X01’s charging handle.
STEP 1: DISASSEMBLE YOUR DONOR PISTOL
1. Remove the magazine and clear the weapon. 2. Retract the slide to the stop and lock open by engaging the slide catch lever. 3. Verify visually and physically that there is no round in the chamber. 4. Rotate the takedown lever clockwise until the takedown lever can no longer rotate (dude to engage the stop that is incorporated into the frame). A plastic or wooden instrument may make this easier and prevent scratches to the firearm. 5. Retract the slide slightly to disengage the slide catch lever. Allow the slide to move forward in a controlled fashion. WARNING: Slide is under spring tension. Maintain positive control during slide removal to prevent damage or injury. Wear eye protection. 6. Move the complete slide assembly (slide, barrel, recoil spring, and guide) forward and off the frame.
7. Remove the takedown lever (turn and pull simultaneously)
8. Push the fire control unit (FCU) forward.
9. Pull up on the FCU rails and remove them to rotate the frame assembly out from the grip module.
STEP 2: REMOVE THE MAGAZINE RELEASE (IF APPLICABLE)
STEP 3: PREPARE YOUR X01
1. Slide the arm brace to its most outward setting (if applicable). 2. Open the X01 module via the latch button in the rear.STEP 4: INSTALL YOUR FIREARM COMPONENTS INTO THE X01
1. Insert the FCU locking tab into the mating slot inside the rear of the X01 grip module.
2. Press down on the frame rails, rotating the frame assembly into position.
3. Insert the takedown lever (turn and push simultaneously) through the corresponding hole on the left side of the grip module/frame assembly, locking the frame assembly in place. A plastic or wooden instrument may make this easier and prevent scratches to the firearm.
4. Guide the slide onto the FCU rails by inserting it through the X01 muzzle area as shown.
5. Retract the slide fully to the rear. Engage the slide catch lever to lock the slide in the open position.
6. Rotate the takedown lever counter-clockwise until horizontal.
7. Close the X01 and ensure the rear latch is engaged.
Note: The X01 upper module is completely closed when the rear latch is engaged.
8. Cycle the charging handle being sure it goes all the way to the rear. Your slide should be released from the slide stop and now cycles with the X01’s charging handle.
STEP 5: INSTALL YOUR MAGAZINE RELEASE
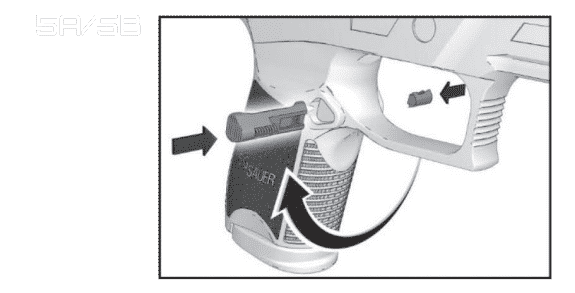
1. Insert the magazine catch and magazine catch spring on the desired side of the pistol body. 2. Insert the magazine catch stop from the opposite side until the magazine catch stop latch engages.